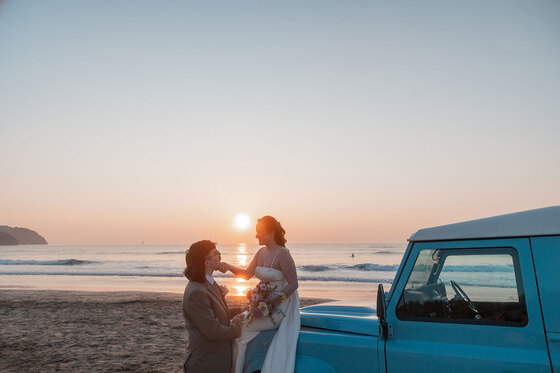
The ocean offers a wealth of ideas for a stylish seaside wedding. Get crafty with wed's step-by-step guide to a marine-inspired affair...
You're in the perfect county for a seaside themed celebration. Revel in the barefoot vibe by throwing a personalised party awash with handmade nautical details; think aqua accents, playful props and decor utilising sand, pebbles, pearls and shells. 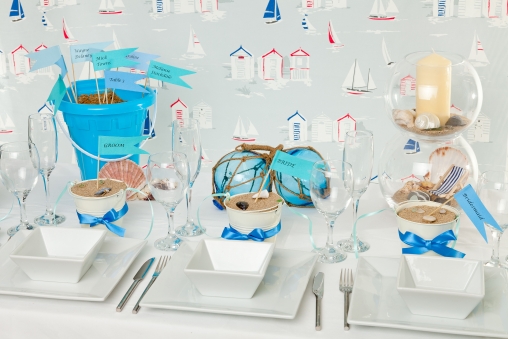
SEASIDE DELIGHTS
Bring the seashore to your tabletops with simple but effective decor. A striking table centre and menu in a bottle oozes a laidback, sea-loving vibe. Escort cards make a creative alternative to the traditional table plan, while handmade favours make for an easy breezy memento of your day.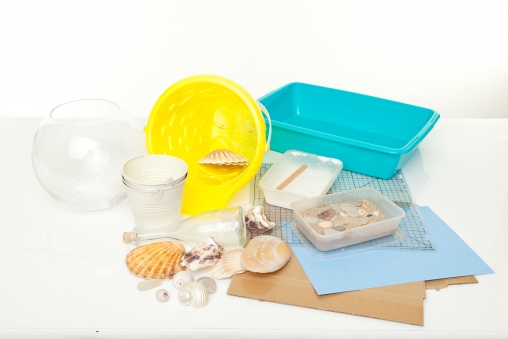
You will need:
Goldfish bowl vases (available from Inspire Hire)
Empty wine bottle or similar
Sand and shells
Beach buckets
Mini enamel buckets (available from Inspire Hire)
Cardboard
Ribbon
PVA glue
Teabags
Paper
Table centrepiece
1) Take two empty goldfish bowl vases.
2) Fill the bottom vase with sand, shells and pebbles.
3) Fill the top vase with sand, shells, pebbles and a pillar candle.
4) Stack one vase on top of another.
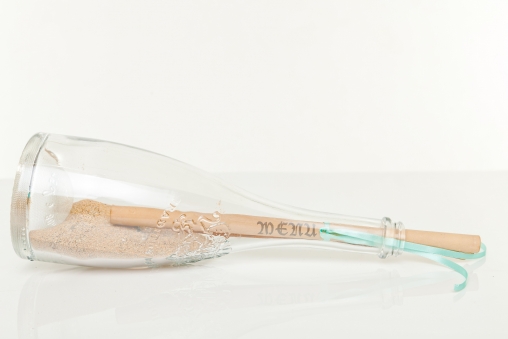
Menu in a bottle
1) Immerse two teabags in a tray of hot water.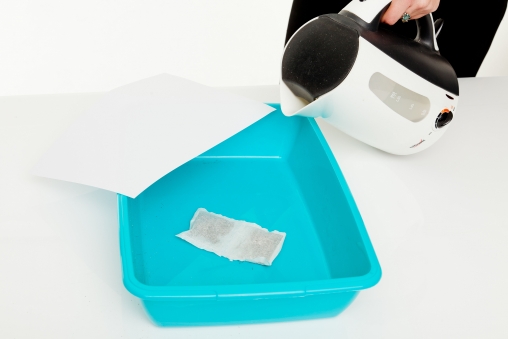
2) When the tea has cooled, place a sheet of A4 paper into the tray.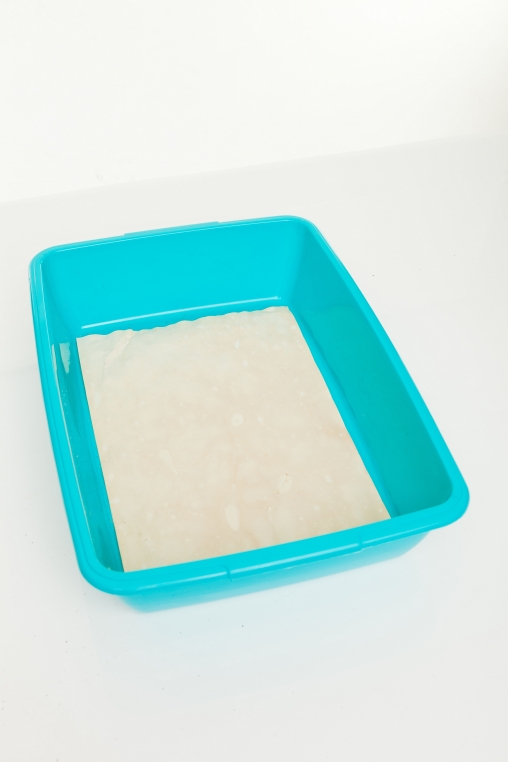
3) Remove before it is saturated and place on a baking tray. Place the baking tray in a warm oven for a short amount of time until the paper looks dry and aged. Check frequently and do not leave it unattended. 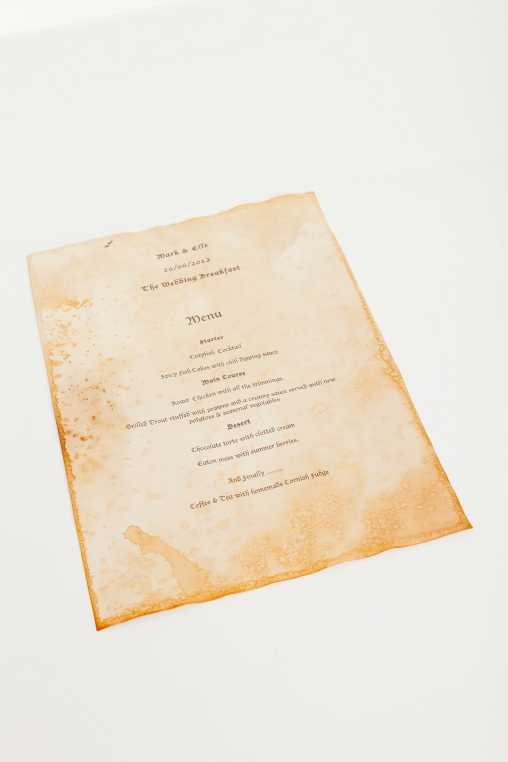
4) Prepare the menu on a PC and print onto the aged paper. On the reverse side, print 'MENU' at the top of the page in landscape format. 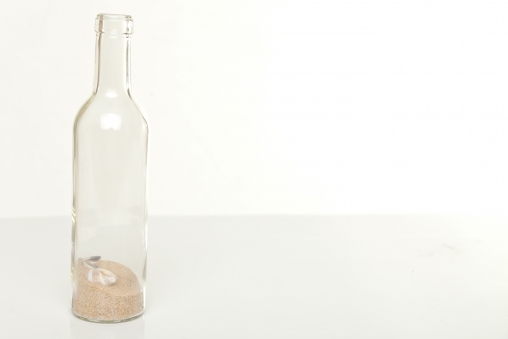
5) Place sand and shells into the bottle. Tightly roll menu and tie with ribbon. Post the menu into the bottle, leaving ribbon ends and/or the end of the menu sticking out of the bottle mouth so that it can be easily removed.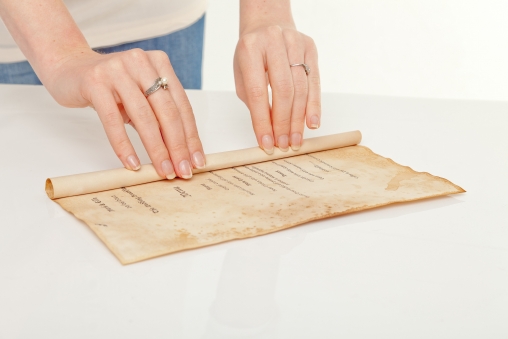
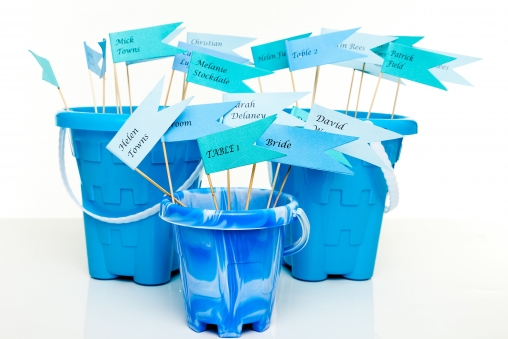
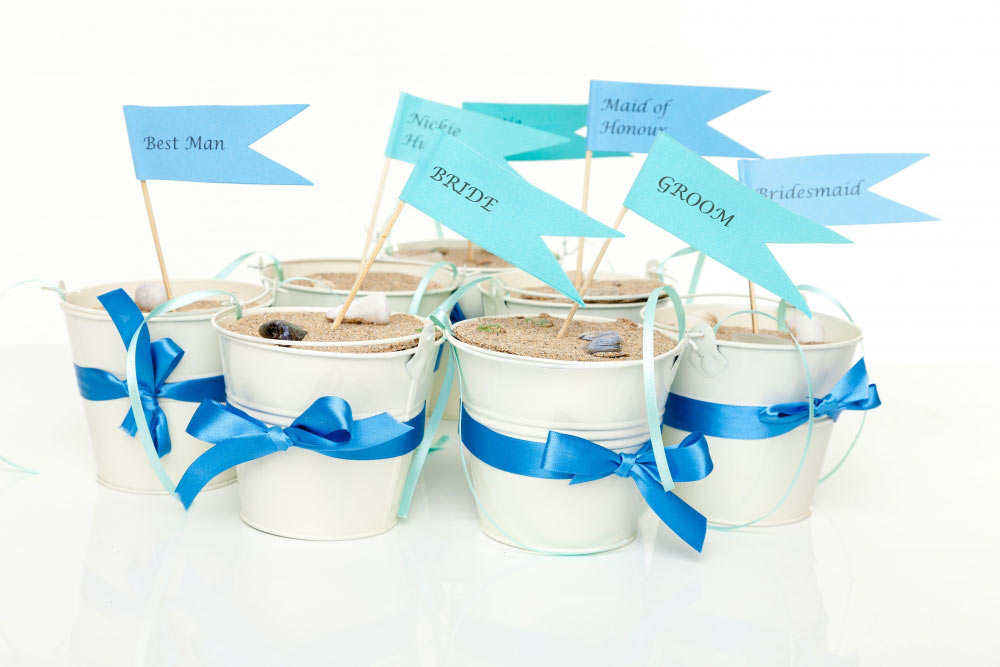
Sandcastle flag escort cards
1) Using a spreadsheet or by hand, print guests' names - and each table number or name - onto A4 coloured card. (For measurements contact Inspire Hire) 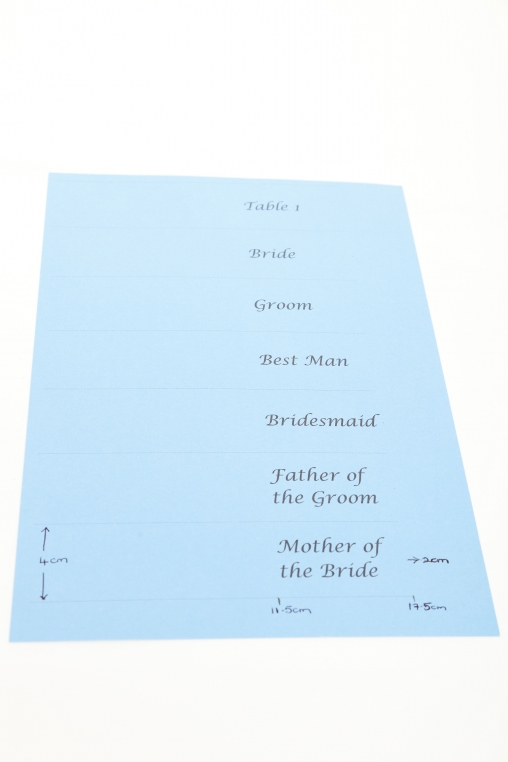
2) Cut out the guests' names into flag shapes and attach to kebab sticks with PVA glue. Do the same for each table number or name.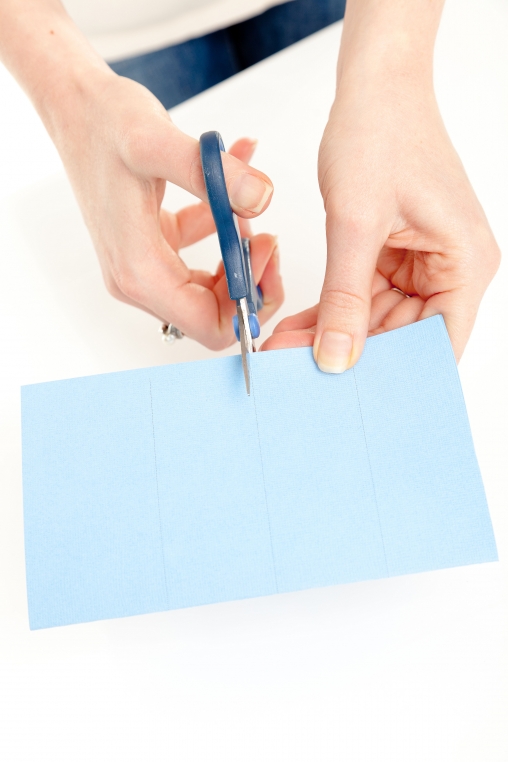
3) Fill beach buckets with sand and place a table number flag into each one, then place guests' name flags in the relevant bucket. Create an escort card table or display this instead of a table plan.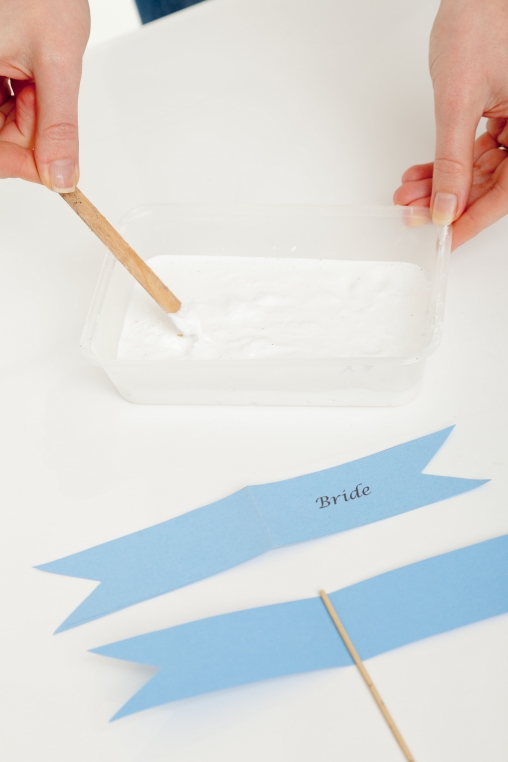
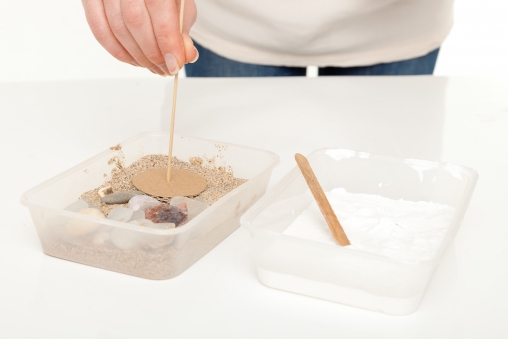
Mini bucket place settings/favours
1) Take the mini buckets and draw around the top of the bucket to create a template for the 'lid'. Using some thin cardboard, cut out lids for each bucket.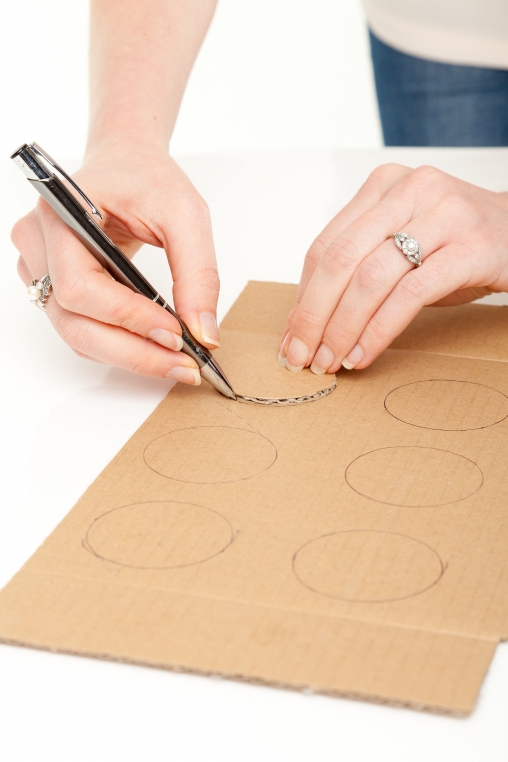
2) Glue a section of ribbon to the underside of the cardboard disc to act as a handle for the lid.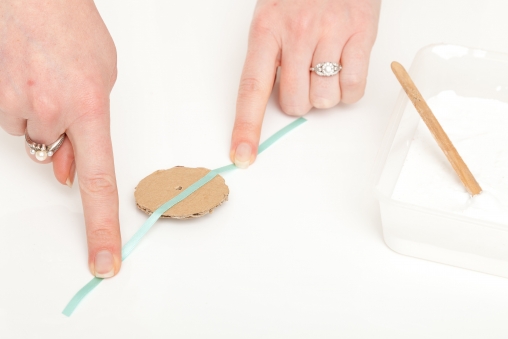
3) Pierce the cardboard disc with a kebab stick and use to dip each disc into PVA glue and then a tray of sand. You can also use glue to fix some small shells and stones to the lid. 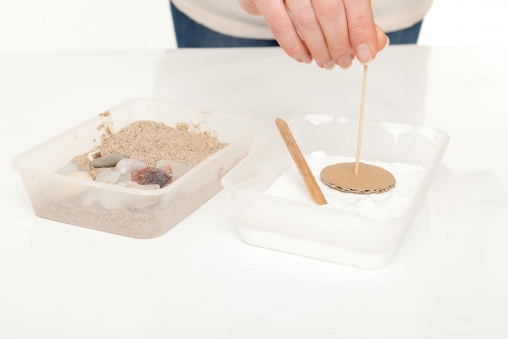
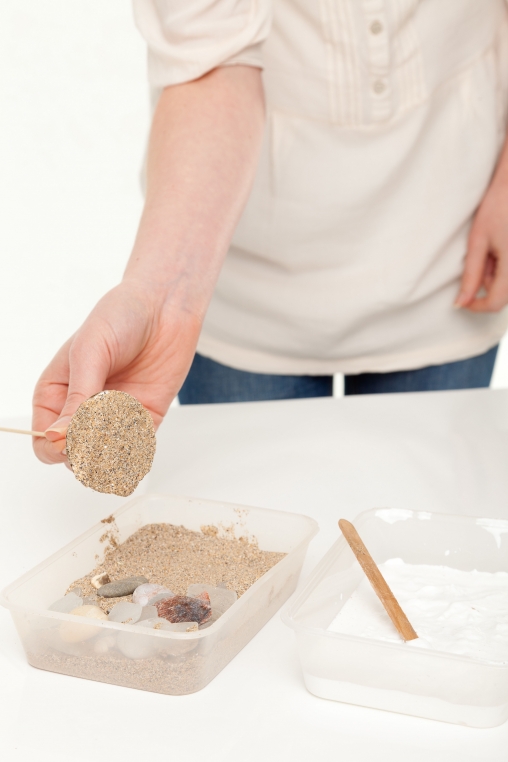
4) Fill each mini bucket with sweets or other small gifts for your guests. Place each sand covered lid onto the top, leaving the ribbon handle outside of the bucket, and place a name flag into each one.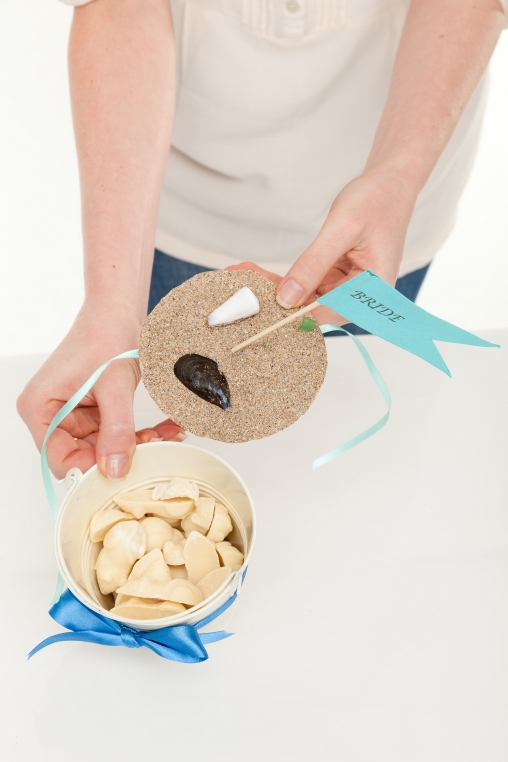
5) Tie a ribbon around each bucket and place in front of each place setting. 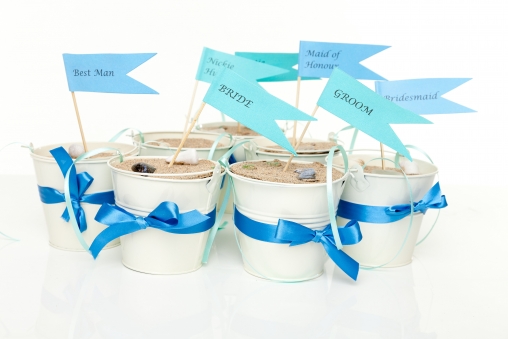
Inspire Hire offers a bespoke DIY wedding service to help you create your dream DIY wedding and a huge range of items available to hire. If you don't fancy doing it yourself, Inspire Hire offers a bespoke venue styling service covering every aspect of venue decoration and design.
07977 574597 www.inspire-hire.co.uk
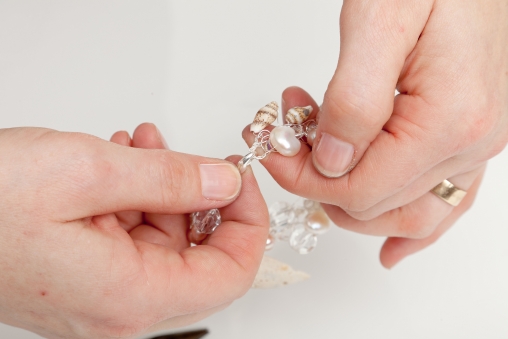
OCEAN JEWEL
There's something ethereal and feminine about this crochet cuff: the soft colours of the sea-glass and shells reflect the rock crystal beautifully, while the tiny crystals provide a touch of sparkle that echoes the sun glinting off the sea.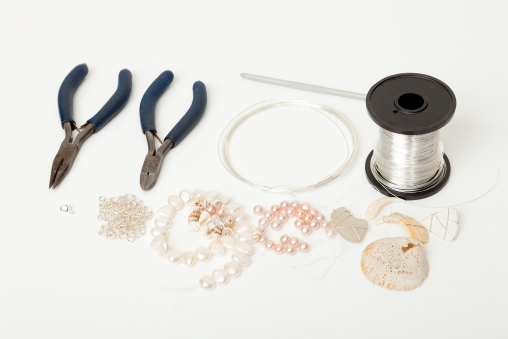
You will need:
About 3m of 0.3mm or 0.4mm wire
Around 40 different size stones or beads: rock crystal, crystals and pearls work well
A few pieces of sea-glass (wire-wrapped) and shells
A hook or clasp
Flat-nosed pliers and snips
A small file
1. Take a 1.5 m piece of 0.4mm wire and make a loop in one end by wrapping or twisting it back on itself. Put your crochet hook through this loop (from front to back) and wrap the wire once around the hook in a clockwise direction. Using the hook, pull the wire through the loop whilst pushing the loop off the hook. You should have one loop on the hook and two loops joined now.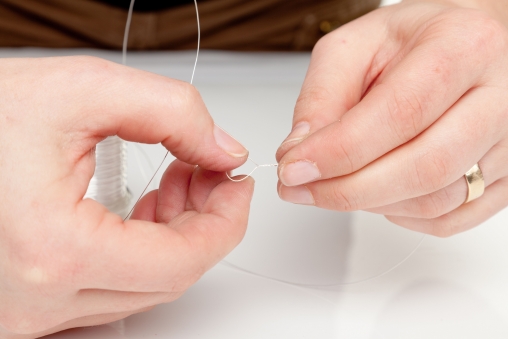
2. Continue with this movement so that you create a chain around 20cm long. Try and keep it loose with fairly big loops: it really doesn't matter if it's a bit messy and it's a lot easier to work with if you can get the crochet hook in easily. 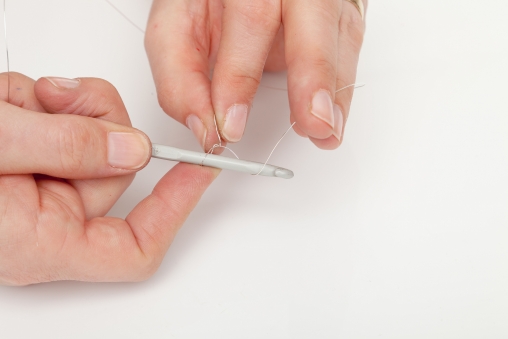
3. Start to crochet the second row by changing direction and putting the hook into the nearest link in the chain. Wrap the wire round the hook as before and use the hook to pull it through both loops so that just one loop is left on the hook. Do a couple of links like this. 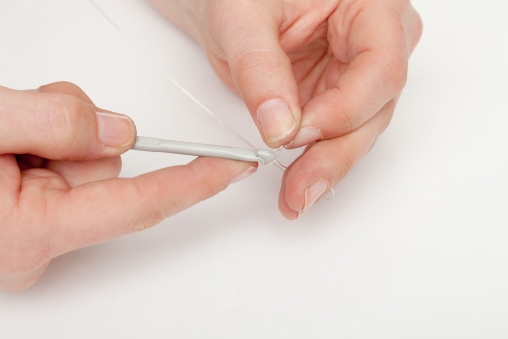
4. Then thread your beads, shells and a couple of wrapped sea-glass pieces onto the other open end of the wire: you'll probably need between 20 and 30 for this row depending on how 'full' you want it to look. Make a little loop at the end to stop them falling off. 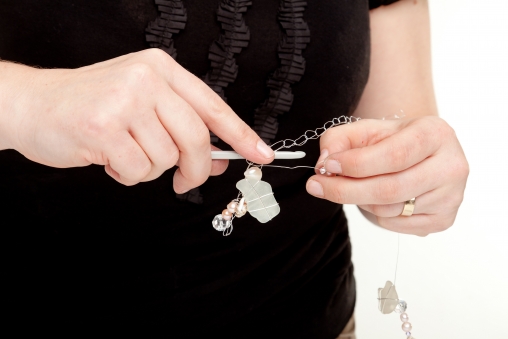
5. Shuffle all these beads and finds to the end where the hook is. Put your hook through the next 'link' from front to back as before and push the bead right next to the chain before you wrap the wire round the hook. Pull the wire through both wire loops on the hook, leaving one on the hook as before: the bead should now be held loosely in place. Keep going with this technique all the way along the string chain. You can be fairly haphazard - just try to get some beads and glass to sit on the cuff in a random way; it's supposed to look messy and sea-weathered.
To make a deep cuff, you might want to join on another 1m length of wire and go back along the cuff, attaching beads and sea-glass in the same way as before; you can just keep going with adding extra rows until you get it as deep as you like.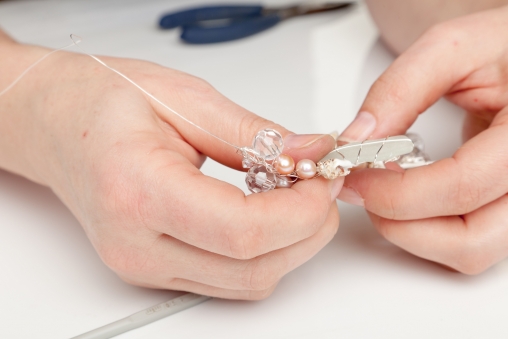
6. To finish, all you need to do is attach a fairly large hook onto one end by wrapping the end of wire through the hook a few times: sort of stitching it on. Then just snip the extra wire off and file any rough edges down gently.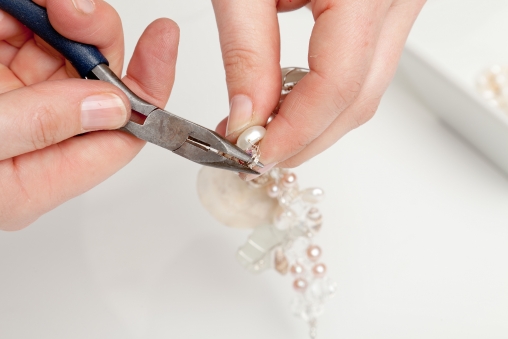
Top tip: to prepare your sea-glass to be incorporated in the cuff, just wrap a 30cm length of 0.6mm wire three times horizontally around the glass and once vertically. Twist the ends together at the back and snip off any excess wire: file any rough edges and the glass can be threaded onto the cuff wire through the back.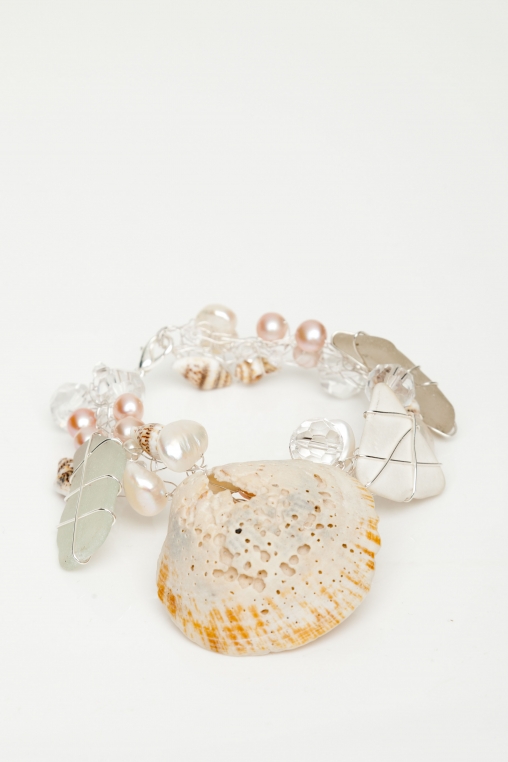
Sarah Drew's new book, 'Wild Jewellery', published by Jacqui Small, is available from 10th June on Amazon.
07951 960647 www.sarahdrew.com
words Elle Winsor-Grime and Sarah Drew
photography Ben Photography
Copyright WED Magazine 2012
Wedding Decor - DIY Brides
The ocean offers a wealth of ideas for a stylish seaside wedding. Get crafty with wed's step-by-step guide to a marine-inspired affair...
Planning your wedding? use our directory to find:
Entertainment Cakes Catering Your Venue Marquee Hire Styling