Send guests' hearts aflutter with these pretty paper crane decorations. Recent bride Gemma Beresford leads a step-by-step DIY tutorial...

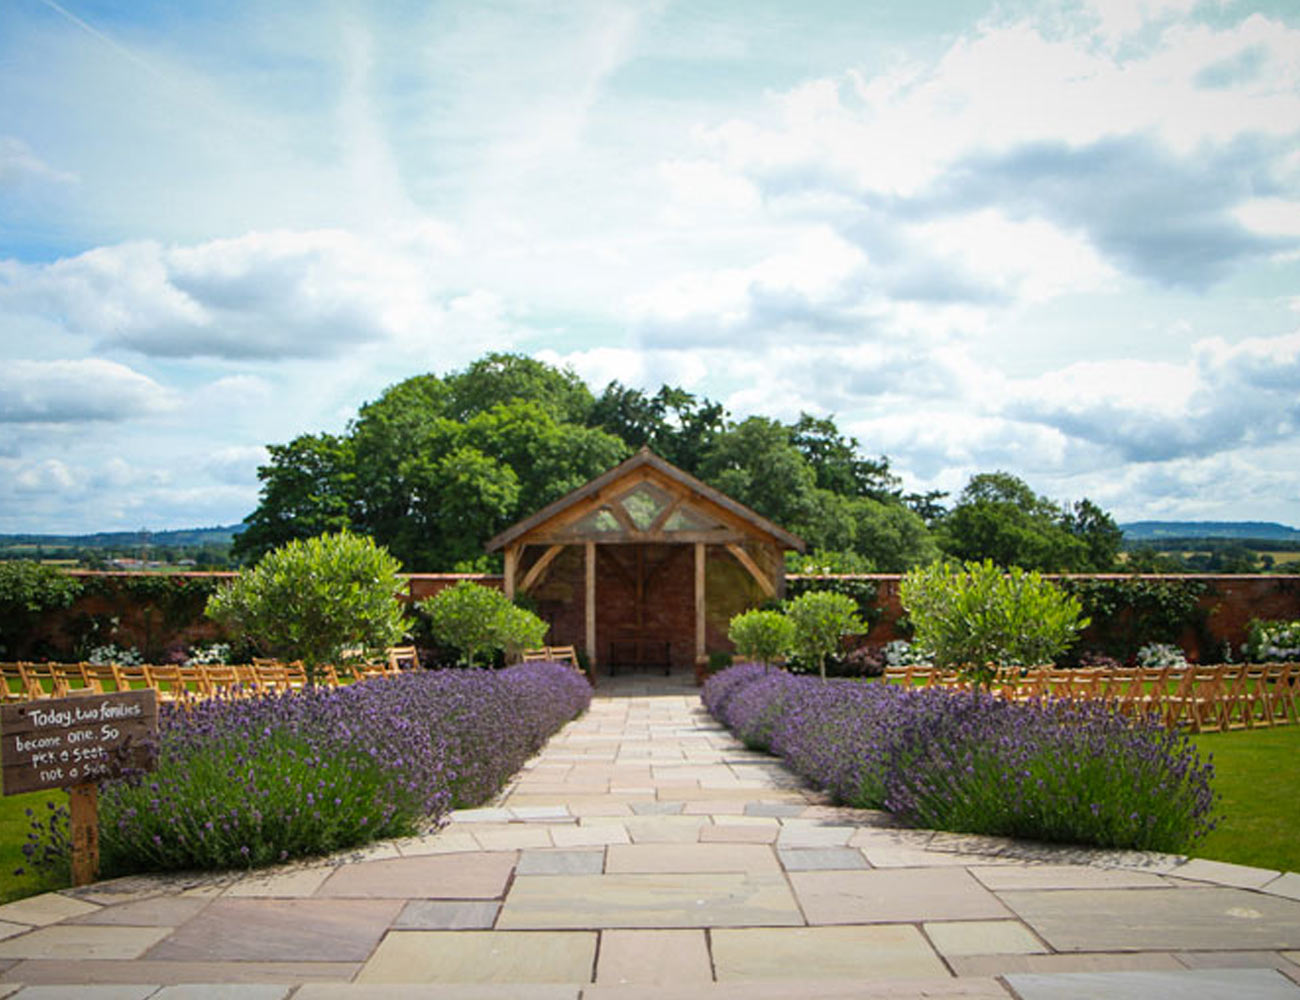
Paper is a brilliantly versatile and effective material for creating wedding decor. And these paper cranes are a beautiful example, as Gemma Beresford, who recently got married in Cornwall, testifies: "Paper cranes look fantastic hanging from the branches of trees. Choose bright colours that will stand out to create the most impact."
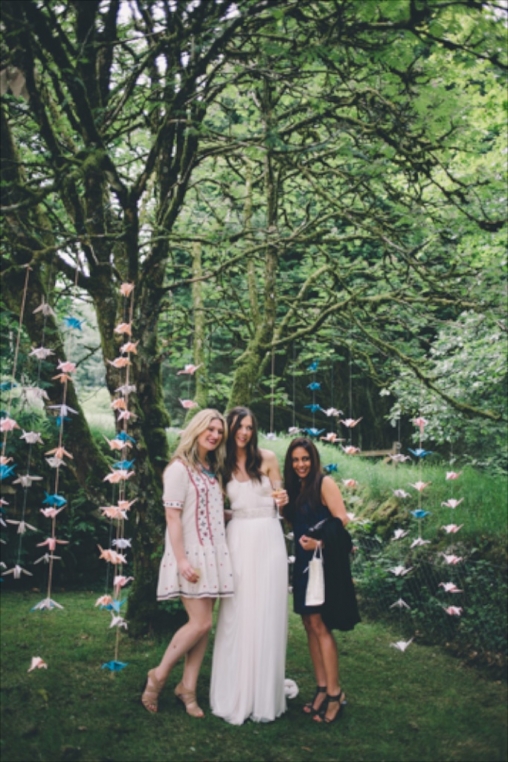
Beyond the aesthetics, paper cranes are thought to bring good fortune. "Japanese legend foretells that anyone who folds 1,000 paper cranes will be granted eternal good luck. They are often given as gifts at Japanese weddings to wish 1,000 years of happiness to the happy couple," explains Gemma. "I don't think I quite managed to make 1,000 paper cranes for my wedding; it was probably more like 300 - but 300 years of happiness will do me just fine!" Follow Gemma's step-by-step instructions to make your very own paper cranes:
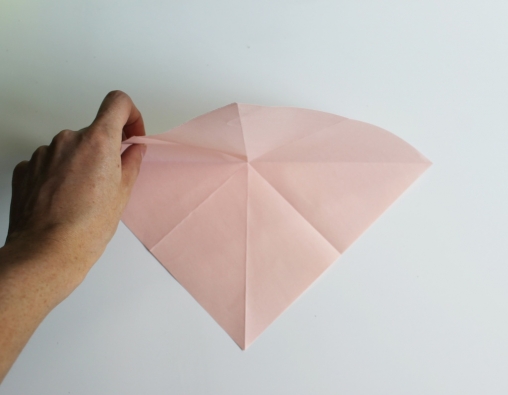
1. Make a square from a sheet of A4 paper and fold score lines forwards and backwards like the diagram attached.

2. Unfold the square and make sure it has been rotated so that the points of the square are at the top and bottom as shown.
3.Fold the top centre point downwards to meet the bottom centre point.
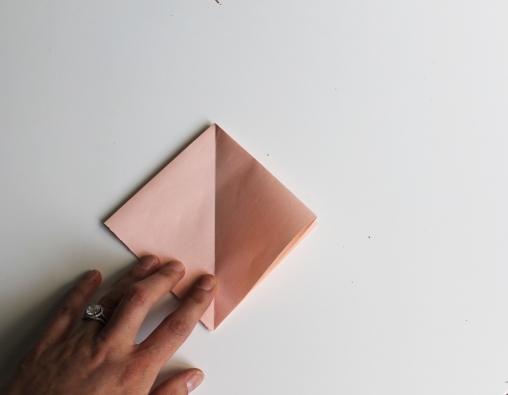
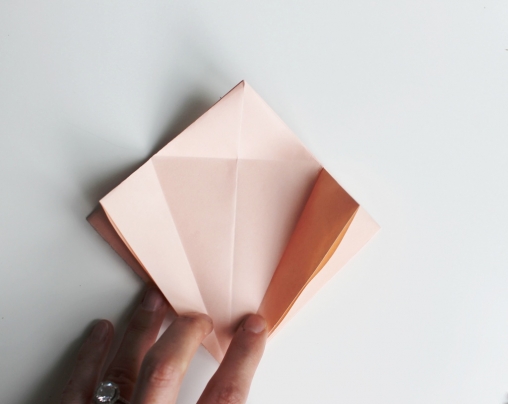
4. Now take the left hand point and fold it in on itself to meet the bottom centre point.
5. Follow the same step on the right hand side, folding the right hand point in on itself towards the bottom point.
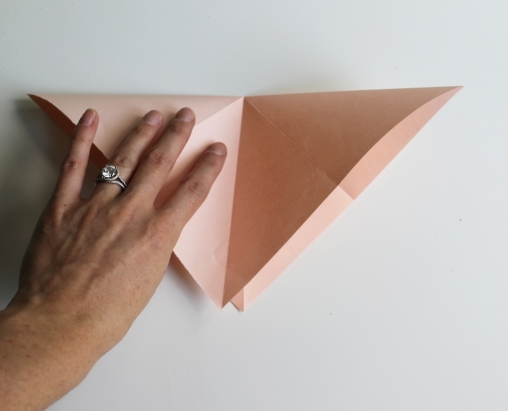
6.Flatten down and score all of the sides - you should now have a diamond shape like this.
7. Fold the right hand side of your paper towards the middle line and score.
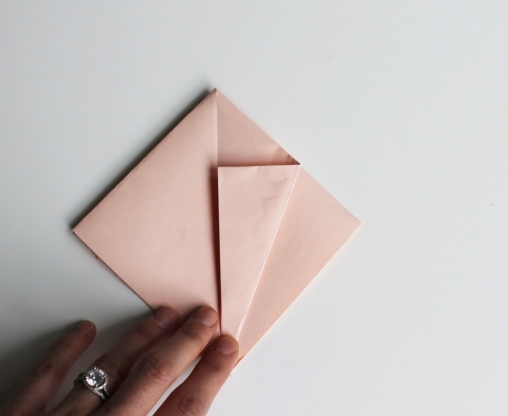
8. Now do the same on the left hand side.
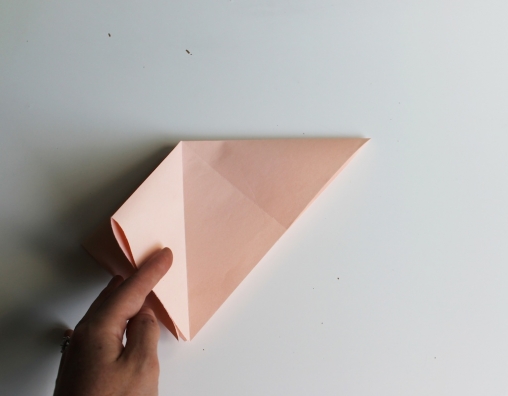
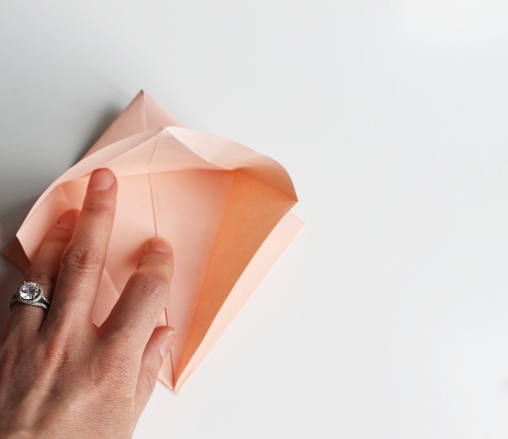
9. Fold the top point down and score as shown.
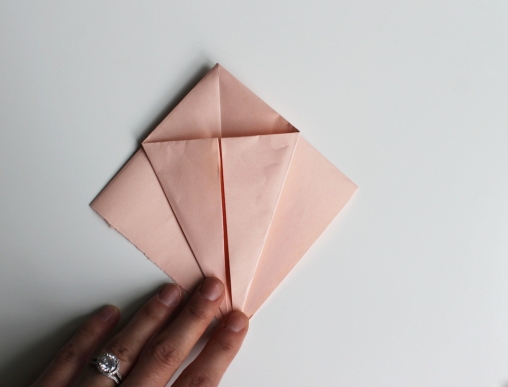
10. Now open up the folds you have just made.
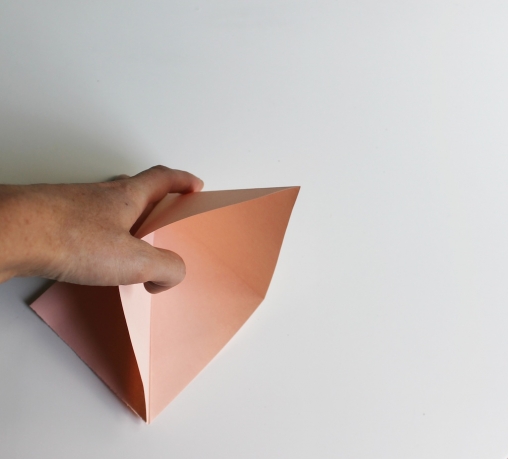
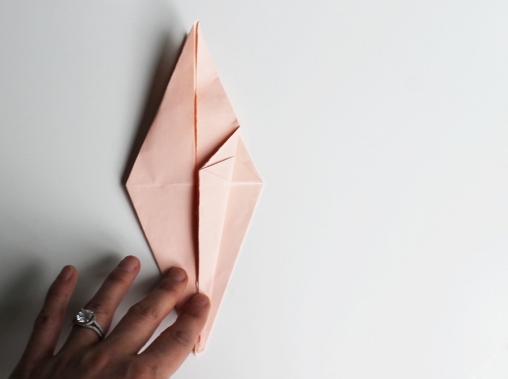
11. Take one layer of paper from your bottom point and begin to lift the paper, taking your bottom point towards the top point of the paper, making sure you fold the edges down.
12. Your origami shape should now look like this...
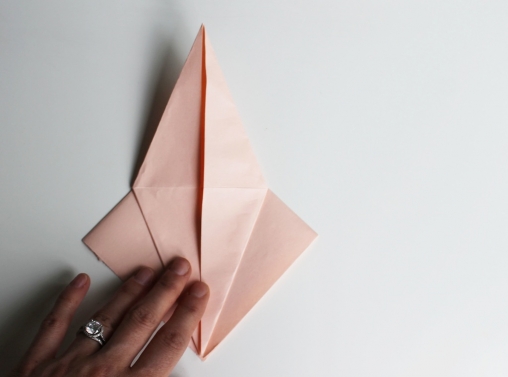
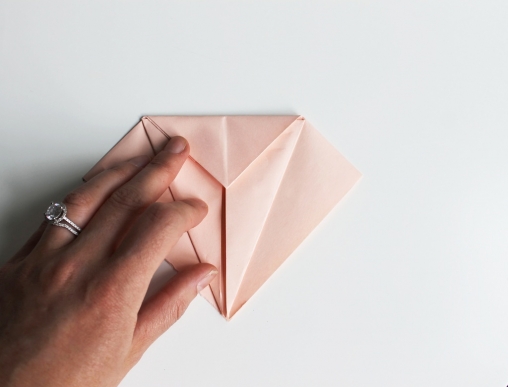
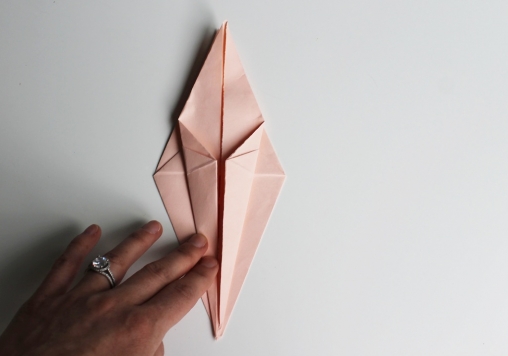
13. Flip your origami shape over and follow the last step. Both sides should now look the same.
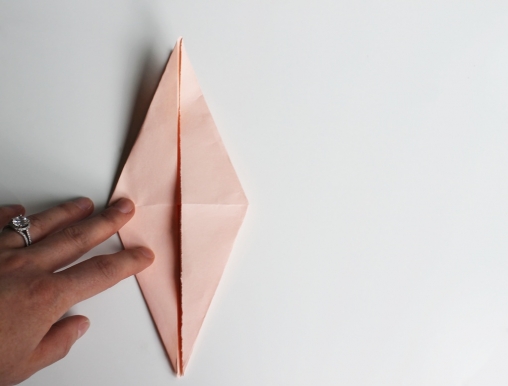
14. Take the right hand point and fold it into the centre.
15. Then take the left hand point and fold that into the centre.
16. Flip the origami shape over and follow the last steps. Your origami shape should now look the same on both sides.
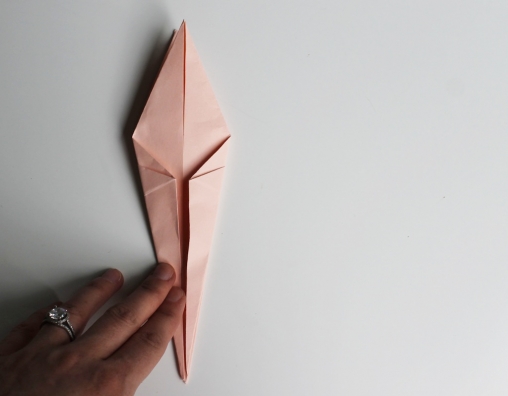
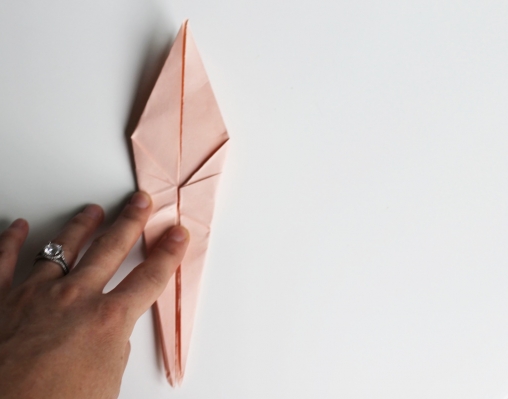
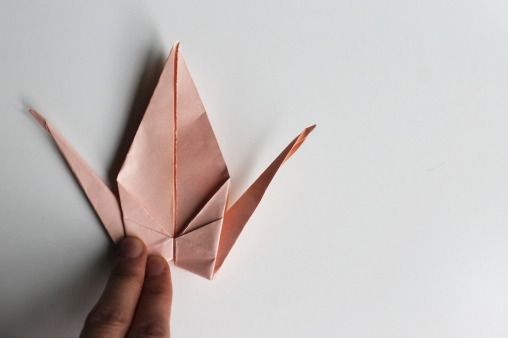
17. Now fold the legs of your origami shape up and outwards, making sure you score the fold down.
18. Follow the last steps on the other side, so they look like this...
19. Unfold the legs, then flip your shape over the other way and do the same on the other side, so your two legs can easily move backwards and forwards.
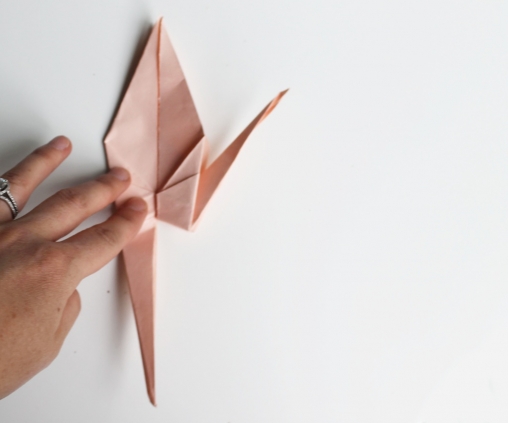
20. Now take one layer from the right hand side and open it out towards the left.

21. Then take the pointy leg at the bottom and fold it upwards and in on itself towards the folds you have just created.
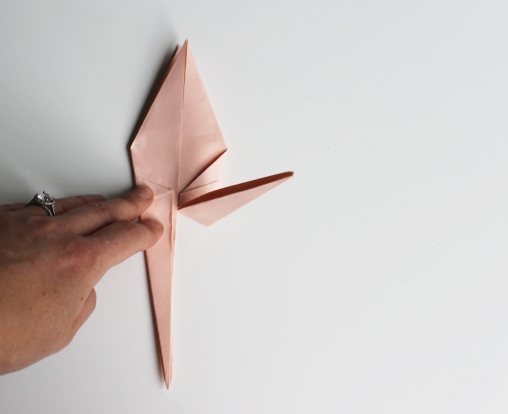
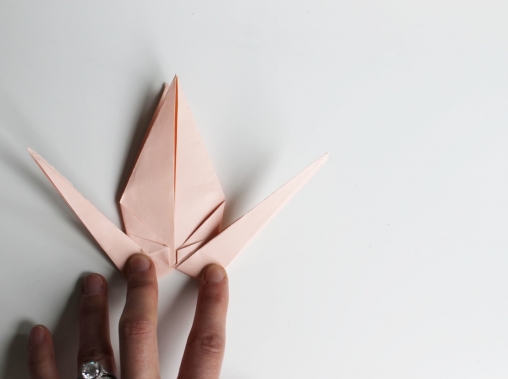
22. You should now have something that looks like this...
23. Follow the same step on the other side until you have a shape like this...
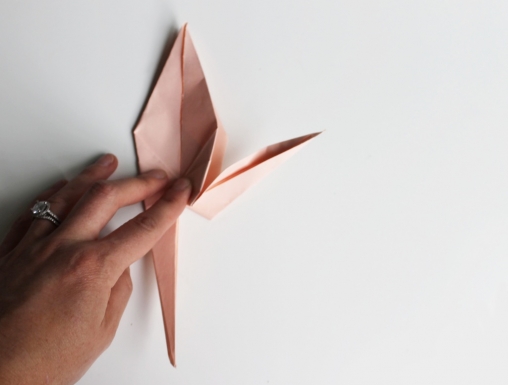
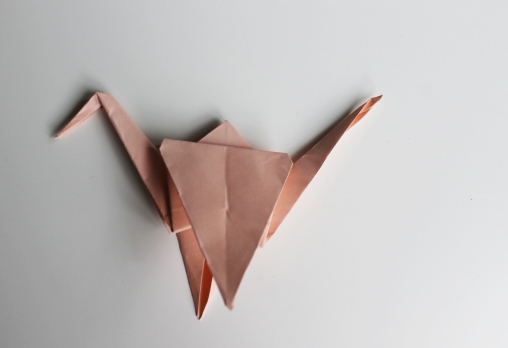
24. Fold one of the points downwards to create the crane's head.
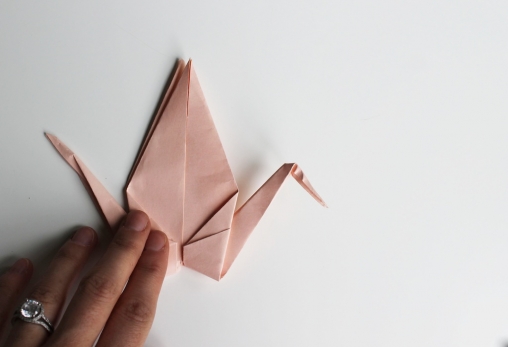
25. Then fold the wings down on either side of the crane. Your crane is now complete! Use wool thread and a large needle to thread through the centre of the crane and up through the centre point. Then tie a knot with extra wool under each crane to keep them in place.
See more DIY tutorials on www.wedmagazine.co.uk
Copyright WED magazine 2013